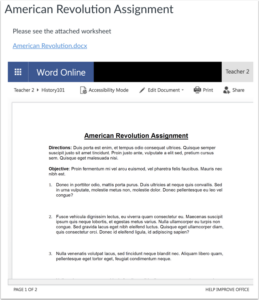
How to create a cloud assignment with an Office 365 File?
- Click on ‘Assignments’.
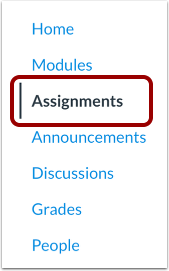
- Click on course ‘Navigation’, and then click the ‘Assignments’ link.
Add an Assignment

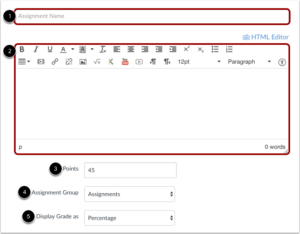
- In the Assignment Name field, create a name for the assignment.
- In the Description field, enter the details of the assignment for your students. When students view the assignment, the description appears at the top of the page. However, the text should not be significantly long in this space
- Enter the number of points for the assignment.
- Select the Assignment Group and select the grading type from the ‘Display Grade as’ menu
- In the ‘Submission Type’ drop-down menu, select the ‘External Tool’ option

- Click the Find button. Find the External Tool
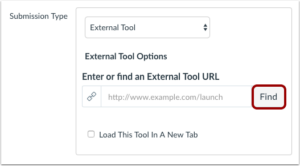
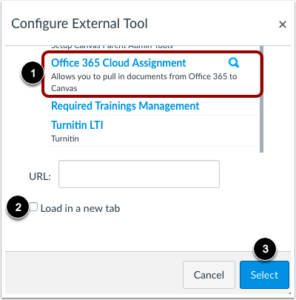
- Locate and select the Office 365 Cloud Assignment
- If you want the assignment to load in a new tab, click the ‘Load in a new tab’ checkbox and then click the ‘Select’ button
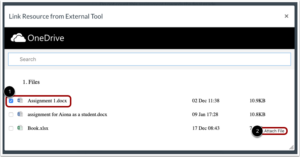
- Locate and select the file you want to link to the assignment
- Click the ‘Attach File’ button
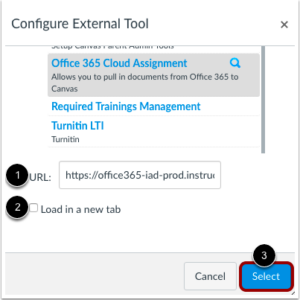
- In the ‘External Tool’ window, view the URL for your assignment file. To select a different file, click the Office 365 link again
- If you want the assignment to load in a new tab, click the ‘Load in a new tab’ checkbox
- Then click the ‘Select’ button.
- If you are ready to publish your assignment, click the ‘Save & Publish’ button. If you want to create a draft of your assignment and publish it later, click the ‘Save’ button

View an Assignment
