1. As an instructor, you can create a new page to add to your course. When creating pages, you can set page permissions as to who can edit the page. You can also add a page to student To Do lists.
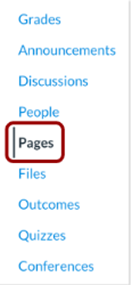
2. In Course Navigation, click the Pages link.

3. Pages is designed to open to the front page for the course if there is a front page selected. To select a page from the Pages Index, click the View All Pages button.

4. To add a page, click the Add Page button.

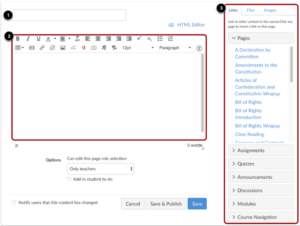
5. To add content to a page, do the following:
• Type a name for your page
• Use the Rich Content Editor to create content for your page. The Rich Content Editor includes a word count display below the bottom right-hand corner of the text box.
• You can also add links, files, and images to the page using the content selector.

6. To edit the page settings, do the following:
• You can decide who can edit the page by selecting the Who Can Edit This Page dropdown menu.
• You can add the page to the student to do list by selecting the Add To Student To Do checkbox. When you add a page to the student to do, it displays in the student’s to do list, as well as the in the course calendar and students’ course sidebar To Do list.
• You can also notify users that content has changed by selecting the Notify Users That This Content Has Changed checkbox.

7. If you are ready to publish your page, click the Save & Publish button. If you want to create a draft of your page, click the Save button. If you try to navigate away from a page without saving, you will generate a pop-up warning.

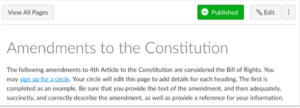
8. When your page is saved in a draft state, you can return to the page and publish it at any time by clicking the Publish button. The button will change from gray to green.

9. To view the page you have created, click on the view all pages and choose the most recent page that has been created.
