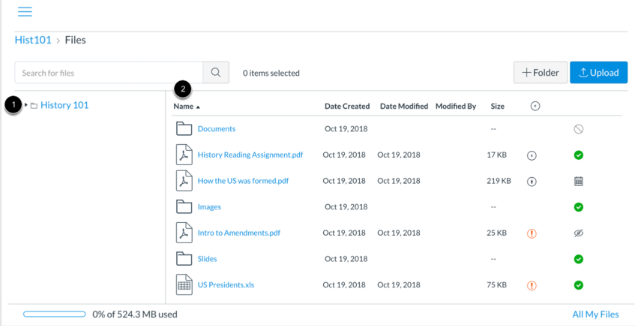
1. As an instructor, Files allows you to store files and assignments within Canvas. You can upload one or multiple files, view all details about your files, preview files, publish and unpublish files, set usage rights, and restrict access to files.
2. In the files main view, the left-hand panel shows all folders for quick navigation. Some folders may be housed within other folders. Click the arrows next to the folder name to expand all folders. Click the name of a folder. All contents within the folder you are viewing will display in the right-hand panel. You can also click folder names in the right-hand panel to view folder content.

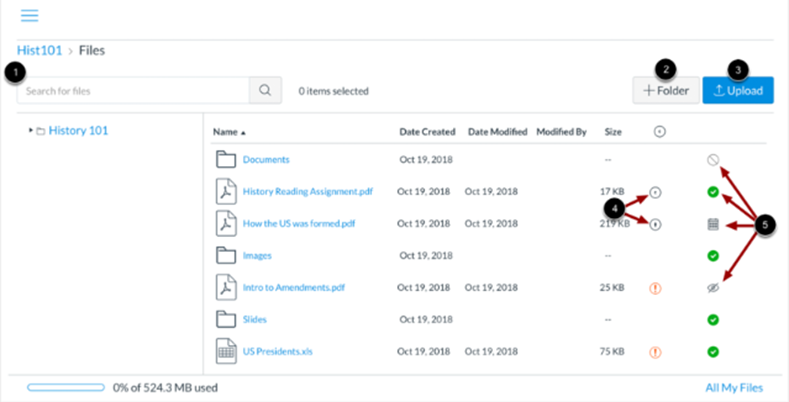
3. To manage files, depending on the file area, there may be several options:
1. Files is fully searchable by file name
2. You can add a new folder to Files to store files; folders can also house other folders
3. For courses and groups using usage rights, set the user right (copyright) for a file
4. You must set a user right for a file before it can be published. Files that do not contain a usage right display as a warning icon
5. Files can be published, unpublished, or include a restricted status.

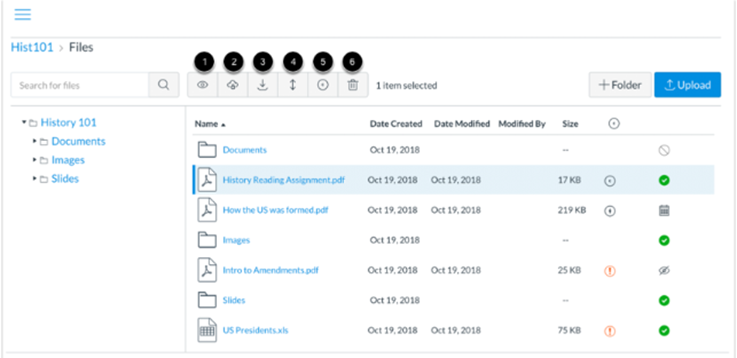
4. To manage selected files: to select a file, click on the name of the file. You can also select multiple files at the same time by holding command (MAC) or control (PC) key.
5. When a file is selected, Files display the file toolbar at the top of the window. Depending on the files area, the toolbar may contain several options to manage the selected file(s):
1. Preview the file;
2. Manage file to restrict access;
3. Download the file;
4. Move the file;
5. Manage Usage Rights for the file;
6. Delete the file.
